
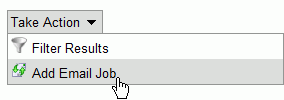
To create an Email Job:
Batch Size

NOTE: The mailer frequency is the maximum number of Emails
that Illume will send in a specified time period. This setting does not
guarantee that the Emails will be sent at the set frequency. It only ensures
that Emails will not be sent more frequently than specified.
The Email Job's actual frequency depends on network conditions and the
availability of system resources. For example, during periods when the
outgoing mail server is busy, the actual rate at which Illume sends Email
may be well below the maximum frequency you requested.
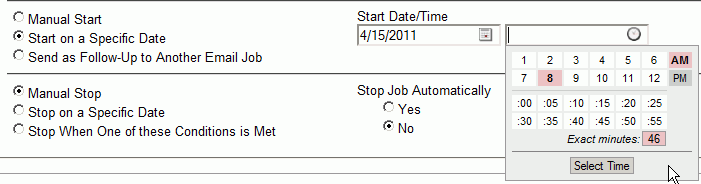
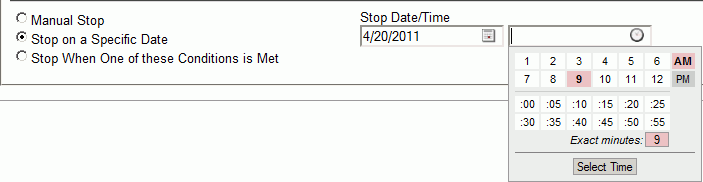
Email Jobs can be scheduled to start on a specific date, or on a relative date. A relative date is a specified number of days after the participant received Email from another Email Job. Email Jobs can be scheduled to end on a specific date, or when specific conditions are met.
NOTE: Only one type of start condition and one type of stop condition apply. For example, if you click the Save button with a stop date specified, then the stop conditions will not apply.
Email Job start and stop conditions apply only to the Email Job. They do not apply to the survey.
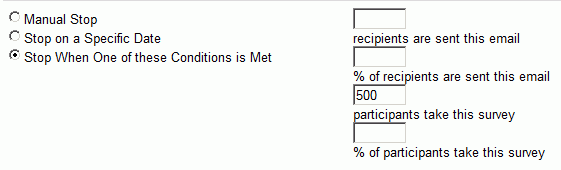
Start Conditions
There are three possible start conditions for an Email Job. Only one condition may apply for an Email Job.

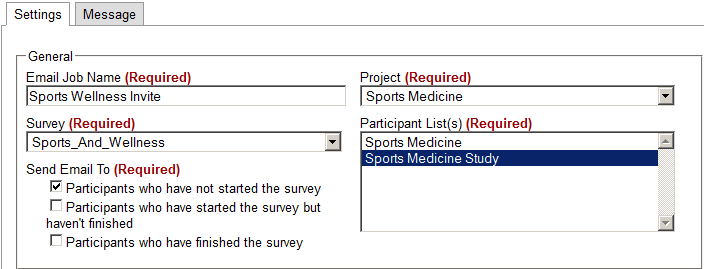
The message in an Email Job can be configured for multiple languages. The language sent to a specific Participant is based on the Language Definition set for that Participant in the Participant List.
To set a Language:
 next to the Language drop-down
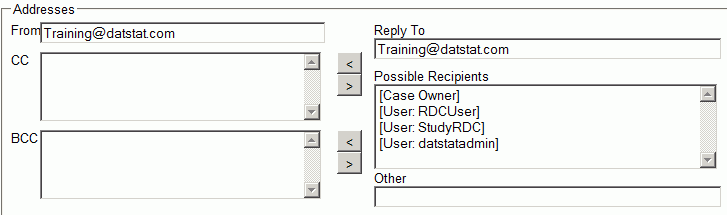
The Addresses section will provide a list of possible recipients for the specific Email. Recipients may include Participants, Case Owners and/or Study Managers.
From - Will be the default From Address configured in the Applications Settings or will provide a drop-down if additional From addresses have been added to the Project by a System Administrator.
Reply To - Will be the same as the From default if left
CC and BCC - Can be added if desired
To compose the text for the email message, click the Email Message tab of the Email Job.
The following fields will be displayed

The HTML editor allows for the composition of a formatted HTML email using a word-processor style interface. Formatting can be applied by simply highlighting text and clicking buttons or selecting options on the toolbar.
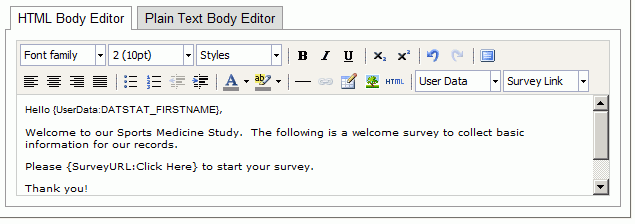
NOTE: There are two tabs on the editor: HTML Body Editor and Plain Text Body Editor.
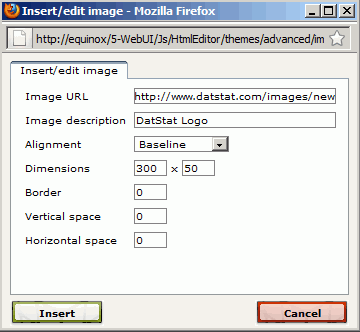
To add an image to an email message, click the image button  and
specify, at minimum, the URL of the image. When adding images to an email,
Illume does not attach the image as part of the message. This means it
is important to specify the full URL of the image, which should be on
a publicly available web server. (Hint: When
clicking the Preview button and the image does not appear in the previewer,
the recipients will not be able to see it.)
and
specify, at minimum, the URL of the image. When adding images to an email,
Illume does not attach the image as part of the message. This means it
is important to specify the full URL of the image, which should be on
a publicly available web server. (Hint: When
clicking the Preview button and the image does not appear in the previewer,
the recipients will not be able to see it.)
Personalizing an Email Message can be accomplished by piping data from participant lists directly into an email. Illume looks for tags in the email message that follow the format {UserData:FieldName} That is: the word UserData, followed by a colon and the name of the field whose data to insert. All of this must be enclosed in curly braces. Capitalization does not matter.
The HTML editor includes a drop-down to help insert user data. Click the drop-down to see the user data fields. Choose the user data field to insert.
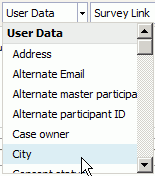
To insert custom user data from the participant list, choose Custom Column from the drop-down and type in the name of the field at {UserData:ENTER CUSTOM COLUMN} .
Email jobs also support a {SurveyURL} tag. This tag will embed a custom survey URL into each email. Illume automatically figures out what information is required for the participant to log in, and it embeds that information in the URL. When a participant clicks on this link, he or she can begin taking the survey without having to log in. Text can be added to the {SurveyURL} tag to display a "friendly" link, rather than a long URL.
For example, the tag {SurveyUrl:click here} would produce the words "click here" as a clickable link. Clicking the link has the same effect as clicking the long survey URL: participants can start responding to the survey questions. Keep in mind, however, that not all participants have HTML enabled mail clients. Those using text-based mail clients will not be able to "click here" to reach the survey. These participants need access to the full survey URL, so they can copy it from the email and paste it into a browser.
The HTML editor includes a drop-down to insert the Survey URL in the email. Whatever is typed in the Enter Link Text becomes the text of the clickable link.
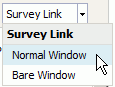
{SurveyURL:ENTER LINK TEXT}
To embed the raw URL, use {SurveyRawURL} to produce the actual URL of the survey. This is the URL in plain text form. It is not clickable, but participants can cut and paste it into the address field of their browser to go to your survey.
NOTE: Selecting Bare Window will launch the survey in a browser window that has no address bar and no toolbar.
To include an opt-out link in the email, use the {OptOutURL} tag, this can be found in the HTML editor under the Survey Link drop down. This tag, like the SurveyURL tag, is a “friendly” link so text can be added for display purposes. Any participant who clicks on this link will be marked as Do Not Contact on that Participant List and any Master or Derived lists that are associated with that list.
Email jobs send "multi-part" messages in two formats: plain text and HTML. Which version the recipient sees depends on their email program and display preferences. If you define an HTML message, and the recipient's email program is configured to display HTML, the recipient will see the HTML version. If the recipient's email program cannot display HTML, or is set to display text only, the recipient will see only the text version. To reach the widest possible audience, include a plain text version of the message.