
Clicking on the View Participant icon ![]() will bring up the Participant
Summary View for that Participant.
will bring up the Participant
Summary View for that Participant.
There are six sections of information for the Participant. If a User does not have permission to one or more sections, it will not appear on the Participant Summary View.
Users can Hide ![]() or Display
or Display ![]() a section by clicking on the icon in the upper right of each frame.
a section by clicking on the icon in the upper right of each frame.
NOTE: Sections may be reordered via drag and drop. When a User reorders the sections, this order is preserved for that User.
The Participant Summary View has the following sections:
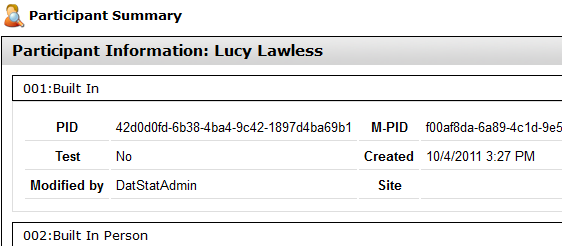
The Participant Summary shows all of the Standard and Custom Participant fields (properties) defined during study configuration.
Users can edit any of
the information by clicking on the Edit Participant Icon ![]() in the upper right of the frame.
in the upper right of the frame.
During study configuration, participant fields can be organized into Property Groups. Users can Hide or Display each group of participant properties by clicking on the icon to the right of each Group heading.
Preferences for Hiding or Showing each section or participant group will be retained as the default for the Participant Summary View.
The Study Tasks data grid displays all Study Tasks associated to the Participant
As with other data grids in the Discovery application, Users can sort by Column and Choose Columns to tailor the contents of this grid. By default this grid will show Active Open Study Tasks. This view can be altered using the Quick Filters poplist.

NOTE: The + or - in the second column indicates a Container Study Task and its Nested Study Tasks when expanded.
The Take Action menu of the Study Tasks allows the User to Add Study Tasks, Choose Columns, Export, and Filter.
For a given Study Task in the data grid, Users can click on the Edit icon to edit the status of that Study Task.
This section presents a visual display of the participant’s current status for the milestone and all Study Tasks currently associated to the Participant in the study workflow.
Study Tasks that are not completed (i.e. pending or interim) are shown in White.
Study Tasks that are completed are shown in Green.
Study Tasks that are closed yet incomplete are shown in Grey.
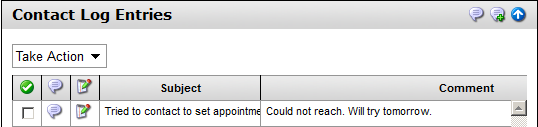
This section displays all of the Contact History for this Participant.
Each entry can be Edited or Viewed by clicking on the correct Icon in the Data Grid.
To log a contact or see all of the entries click on the Icons in the upper right of the pane.
![]() See
a history of all communication with this person
See
a history of all communication with this person
![]() Record
details of an attempted or completed contact with this person
Record
details of an attempted or completed contact with this person
This section is used to record Participant level notes. The Participant Notes section is an open text field for adding any information that may be useful when interacting with this participant. For example, a note may say “This participant is named William but goes by Bobby”.
To Add a Note for a Participant:
Click
on the Add Note ![]() icon in the upper right of the
Participant Notes frame.
icon in the upper right of the
Participant Notes frame.
Use the Note Regards drop-down to select the Study Task that the note will reference. General notes can be recorded under Other.
Enter the Note.
Click Save and OK.
The New Note will appear in the Participant Notes section. Notes are displayed vertically in the order entered with most recent appearing at the top of this section.

This section of the Participant Summary View is used to enter, view and manage contact information for the participant.
The Discovery application enables Users to enter an unlimited number of addresses (physical or mailing addresses), phone numbers, and email addresses for a study participant. One Address, Phone Number, and Email Address can be marked as “Primary” for a participant.
Each piece of contact
information (address, phone, or email) listed has an Edit this "Item"
![]() icon
beneath it. Click on that icon to edit that item. Users can edit or change
a piece of contact information, or can disable it by un-checking the box
that indicates whether or not the participant can still be reached at
this address/phone/email.
icon
beneath it. Click on that icon to edit that item. Users can edit or change
a piece of contact information, or can disable it by un-checking the box
that indicates whether or not the participant can still be reached at
this address/phone/email.
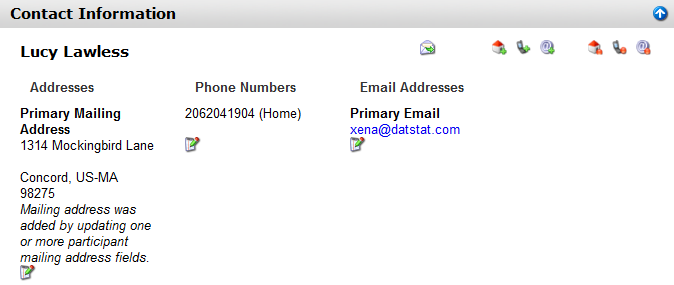
![]() Send an email to this person now
Send an email to this person now
![]() Add a new address for this
person
Add a new address for this
person
![]() Add a new phone number for
this person
Add a new phone number for
this person
![]() Add a new email address for
this person
Add a new email address for
this person
![]() Show
older addresses that have been marked as no longer active
Show
older addresses that have been marked as no longer active
![]() Show
older phone numbers that have been marked as no longer active
Show
older phone numbers that have been marked as no longer active
![]() Show
older email addresses that have been marked as no longer active
Show
older email addresses that have been marked as no longer active